Are you looking for ways on how you can edit themes offline or work on your dashboard without having an internet connection? The idea sounds convenient, right?
Installing a WordPress on your desktop and computer is simple like using a one-click installation feature offered by most of the hosting companies.
However, if you want to master WordPress, you might need to consider familiarizing the offline setup.
At first, I thought it’s really hard and it required programming knowledge but these 3 tricks can save three forth of your time. 🙂
Step 1 – Install and Configure The Xampp Console
- Install a xampp on your desktop or laptop.
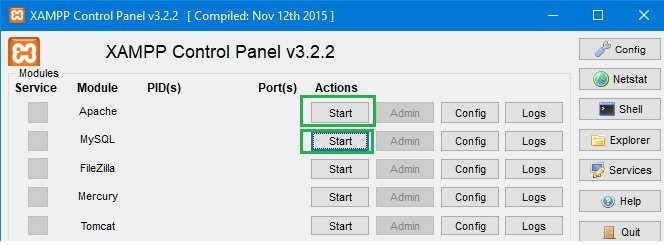
- After installation, you will see a console that’s composed of 5 modules.
- Run the Apache and MySQL module by clicking the start button.

Beside Mysql row, click the admin button to create a database or you can simply go to localhost/phpmyadmin/ to access the phpmyadmin console.
- To add a database, click the New
- Name your database (As an example, I used wp, you can rename it whatever you want).
- Click the check all
- Hit the create button

Step 2: Placing The WordPress Files On The Right Directory
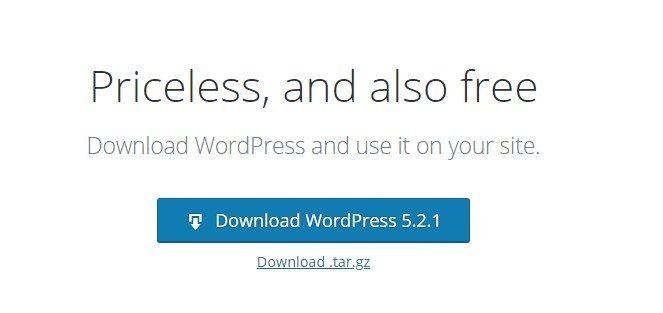
Step 2:1: Download the latest version of WordPress on the there official website.

If you’re using iOS, please the .tar.gz
Step 2: 2: Unzip it into the htdocs folder. Usually, it is located at C:/Program Files/XAMPP/htdocs.
So basically, it looks like C:/Program Files/XAMPP/htdocs/wordpress/
Note: you can rename the WordPress folder, just keep in mind that this will serve as the extension of your local link. Since we use WordPress, our front-end link will be localhost/wordpress

You can see that WordPress is already live, but in order to make it work, you need to connect the database that we have created in step 1.
Step 3: Connecting the Database
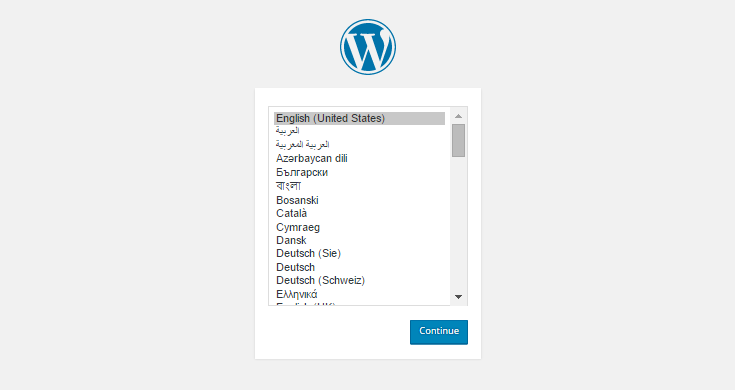
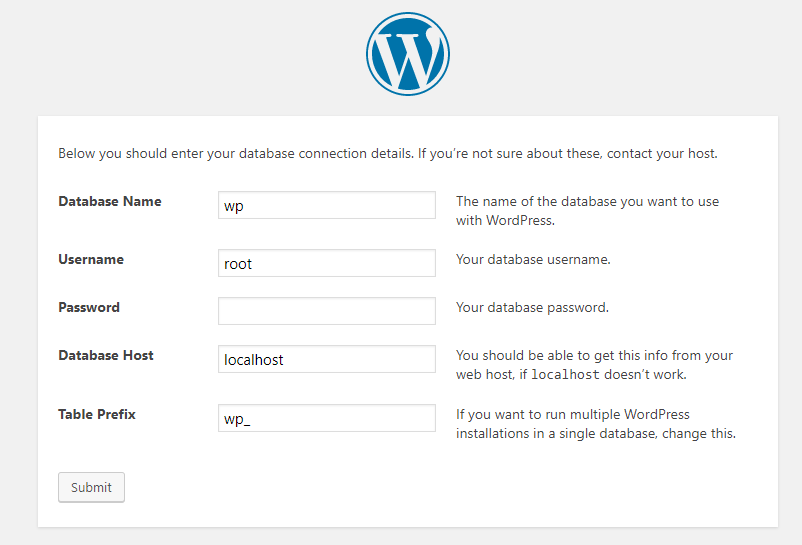
In the process of installation, simply select a language and follow the instruction until you reach the database Q&A field. For other options, just edit the wp-config but for those new for backend, let’s just stick to front-end configuration. 🙂

Here’s the format
- Database Name: WP (this is the name we have used in the database
- Username: Root (we’re using root since we’re installing the WordPress locally)
- Password: leave it black
- Database host: localhost
- Table Prefix: wp_
Lastly, name the general settings.
And now, you have a demo site.
If you want a more detailed clarification, kindly watch the video presented at the topmost part of this blog.
Local WordPress Installation Highlight Of The Day | Tweetable
WordPress installation is not tricky, you just need to do it slowly or else your site won’t be live quickly – Angelic Sanoy
Related topic: How to permanently remove malware on your WordPress site
